Turning Kitchen Scraps into Gold: A Beginner's Guide to Home CompostingComposting

Turning Kitchen Scraps into Gold: A Beginner's Guide to Home Composting

3 min read 567 words

Learn how to turn your food waste and yard trimmings into nutrient-rich soil amendment with this simple, step-by-step guide to home composting.

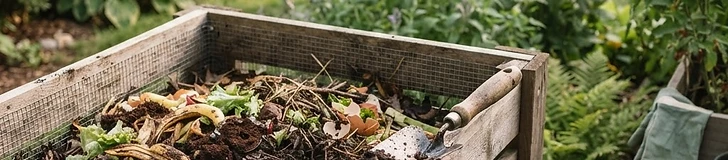
Why Compost? Composting is nature's way of recycling. By transforming your organic kitchen scraps and yard waste into nutrient-dense humus, you reduce landfill contributions while creating a free, organic fertilizer for your home garden. It is the single most effective way to improve soil health, retain moisture, and grow healthier plants. ## Choosing Your Setup Before you start, decide whether you want an open pile or a contained bin. If you live in a suburban environment, a contained bin is often preferred to keep things neat and deter pests. You can purchase a ready-made tumbling composter, which makes turning the pile easy, or build a simple bin using untreated cedar wood or wire mesh. If you have a larger property, an open pile works just as well. Simply choose a level, well-drained spot in a corner of your yard that receives partial shade. ## The Science of Brown and Green To build a successful compost pile, you need to balance two types of materials: "Greens" and "Browns." Think of greens as the fuel and browns as the foundation. Greens are nitrogen-rich materials like vegetable scraps, fruit peels, coffee grounds, and fresh grass clippings. Browns are carbon-rich materials like dry leaves, straw, shredded cardboard, untreated sawdust, and small twigs. A good ratio is roughly one part green to three parts brown by volume. If your pile starts to smell or get slimy, add more browns. If it seems to be doing nothing, add a few more greens and ensure it is moist. ## Maintaining Your Pile Maintenance is minimal but essential. Your pile needs air, water, and heat. Every few weeks, use a pitchfork or a shovel to turn the materials. This introduces oxygen to the microorganisms that do the heavy lifting of decomposition. Keep the pile about as damp as a wrung-out sponge. In hotter US zones, like 8b or 9, you may need to water your pile during dry spells to keep the biological activity moving. If you live in cooler zones, such as 4 or 5, consider covering your bin during the winter to retain heat. ## Practical tips - Always chop large items into smaller pieces to speed up decomposition. - Avoid adding dairy, meat, grease, or pet waste, as these attract pests and create unwanted odors. - Keep a small collection container with a lid in your kitchen to make daily scrap disposal convenient. - Use a dedicated thermometer if you want to track the heat; a healthy pile should reach 130°F to 150°F in the center. - If the pile becomes too compacted, add more dry, woody material like twigs to create air channels. - Cover your pile with a tarp if you are expecting heavy rainfall to prevent it from becoming waterlogged. ## The Harvesting Process Depending on your climate and how often you turn your pile, finished compost will look dark, crumbly, and smell like fresh earth. It usually takes anywhere from three months to a year. When you no longer recognize the original materials and the pile has cooled down, it is ready to use. Spread it over your garden beds as a top dressing, mix it into potting soil for containers, or work it into the ground before planting your spring seedlings. ## Quick takeaway Balance your greens and browns, maintain moisture, and let nature do the rest to turn your household waste into premium garden fertilizer.

#gardening#composting#sustainability#soil health#beginners guide

More in Composting

We use a couple of cookies to keep you signed in and remember your settings — no tracking ads, and we never sell your data. Read our privacy policy.