
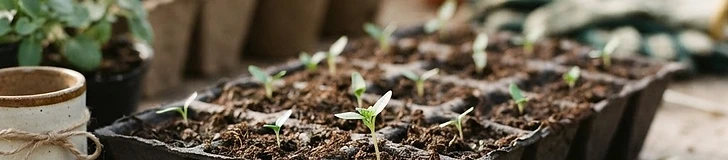
Starting your own seeds indoors is one of the most rewarding parts of gardening. It allows you to choose unique varieties that you will not find at your local big-box nursery and gives you a head start on the growing season, especially in regions with shorter frost-free windows. To grow stocky, resilient plants that thrive once transplanted, you need to master the basics: the vessel and the medium. Success begins with understanding that a seedling is a delicate ecosystem requiring stability, moisture control, and ample airflow.
Understanding Cell Sizes and Material
When you walk into a garden center, you are greeted by an overwhelming array of trays and cell packs. The most common choice is the plastic cell insert, typically found in 72-cell or 128-cell configurations. For most beginner vegetables like tomatoes, peppers, and brassicas, a 72-cell tray is ideal. These cells are deep enough to encourage proper root development without requiring excessive amounts of soil. If you are starting larger, fast-growing seeds like zucchini or sunflowers, consider using 4-inch pots instead. These larger volumes prevent the plant from becoming root-bound too quickly.
Material matters just as much as size. While cheap, thin plastic trays are affordable, they are often flimsy and prone to cracking after one season. If you are serious about gardening, consider investing in heavy-duty, BPA-free plastic trays that can last for years. Alternatively, soil blocks are a fantastic, plastic-free option. Using a specialized tool, you compress potting mix into small, free-standing cubes. This method is excellent for root health because the roots are air-pruned when they reach the edge of the block, preventing the circling patterns often seen in plastic cells. Regardless of your choice, ensure your containers have adequate drainage holes. Stagnant water at the bottom of a cell is the fastest way to invite fungal diseases like damping-off.
The Anatomy of the Perfect Seed Starting Mix
Many beginners make the mistake of using standard garden soil or heavy potting soil for seed starting. Garden soil is far too dense, often harbors pathogens, and may contain weed seeds that will compete with your seedlings. Instead, you need a dedicated seed-starting mix. A high-quality mix is lightweight, sterile, and designed to hold moisture while allowing for excellent aeration.
Look for a base of peat moss or coco coir, which provides water retention, mixed with perlite or vermiculite. Perlite is that white, pumice-like rock you see in bags of soil; it is essential because it creates tiny air pockets, preventing the mix from compacting into a solid brick. If you prefer to go organic, check the label for OMRI-listed ingredients. Some mixes also come pre-inoculated with mycorrhizal fungi, which are beneficial microorganisms that help your seedlings absorb nutrients and water more efficiently once they are moved into the garden.
Managing Moisture and Temperature
Once you have your seeds in their cells, the real work begins. Seeds need consistent moisture to germinate, but they also need oxygen. Over-watering is the most common pitfall for new gardeners. Use a spray bottle to keep the surface moist until germination, then switch to bottom watering. By placing your trays in a solid, no-hole holding tray and adding water there, you encourage roots to grow downward toward the moisture, resulting in a stronger, deeper root system.
Temperature is the often-overlooked variable. Most common vegetable seeds germinate best in temperatures between 70°F and 80°F. If your home is chilly, a waterproof heat mat is a worthwhile investment. It speeds up germination significantly, especially for heat-loving crops like peppers and eggplants, which can sit dormant in cool soil for weeks. Once the seeds sprout and you see green leaves, remove the heat mat immediately to prevent the seedlings from becoming leggy and weak.
Practical Tips for Seedling Success
- Label everything immediately. You will not remember which tomato variety is which once they are all three inches tall.
- Use a humidity dome for the first few days to keep moisture levels high, but remove it as soon as the first sprout emerges to improve airflow.
- If using plastic trays, sanitize them with a diluted bleach solution before reusing them to kill any lingering pathogens.
- Always use fresh seed-starting mix each season; recycled soil from last year is a high risk for disease.
- If your seedlings start looking pale or spindly, move your light source closer to the tops of the plants to mimic the intensity of the sun.
- Aim for a soil temperature that feels comfortably warm, not hot, to the touch.
Quick Takeaway
Use clean, sterile seed-starting mix and appropriately sized, well-draining containers to give your seeds the healthiest start possible.