
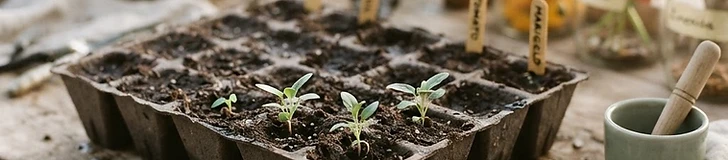
Starting your own seeds is one of the most rewarding parts of gardening, offering a sense of control that store-bought starts simply cannot match. However, the difference between leggy, struggling seedlings and vibrant, stocky transplants often comes down to the quality of your starter equipment and the medium you choose. By focusing on drainage, cell volume, and sterile growing conditions, you can set your garden up for success from day one. ## Understanding Your Container Options Selecting the right vessel is about balancing root development with space efficiency. For most home gardeners, plastic nursery trays with cell inserts remain the industry standard for good reason. They are durable, reusable, and easy to clean. When browsing options, look for cell sizes that match the intended crop. Small, 72-cell trays are perfect for greens like lettuce or spinach, which do not mind being moved early. For larger crops like tomatoes, peppers, or squash—which you might keep indoors for 6 to 8 weeks—you should opt for 32-cell or 18-cell trays. The larger volume prevents roots from becoming pot-bound too early, which is a common cause of stunted growth in the garden. Avoid using repurposed containers like yogurt cups unless you drill substantial drainage holes in the bottom. Without adequate drainage, the soil at the base of the container stays saturated, leading to a condition called damping-off, a fungal disease that can kill a whole tray of seedlings overnight. ## The Importance of a Quality Mix One of the most frequent mistakes beginners make is using garden soil or standard potting soil for starting seeds. Garden soil is too dense, heavy, and potentially filled with weed seeds or soil-borne pathogens. Instead, you need a high-quality, lightweight seed-starting mix. These blends are usually composed of sphagnum peat moss or coconut coir, mixed with perlite or vermiculite. This composition provides excellent aeration, which allows delicate baby roots to expand rapidly, and enough water retention to keep the seeds hydrated without drowning them. Because these mixes are sterile, they eliminate the risk of introducing harmful bacteria to your vulnerable seeds. If you are starting seeds in a cold climate like USDA Zone 5, ensure your mix is warmed to room temperature before you plant, as cold, wet soil can cause seeds to rot before they even manage to sprout. ## Managing Moisture and Airflow Once your seeds are tucked into their cells, the environment is just as important as the materials you chose. Using a humidity dome—a clear plastic lid that fits over your tray—is an excellent way to maintain a consistent moisture level during the germination phase. However, as soon as you see the first green loop of a sprout breaking the surface, you must remove the dome. Leaving it on too long creates a stagnant, overly humid environment that invites mold. At this stage, your seedlings need airflow. If your indoor space feels stuffy, consider placing a small oscillating fan nearby, running on its lowest setting. This breeze does more than keep the air moving; it physically stimulates the stems of the seedlings, signaling them to grow thicker and stronger, which prepares them for the winds they will eventually face outdoors. ## Practical Tips for Success - Sanitize your reusable trays with a mild bleach solution of one part bleach to nine parts water before each season. - Always label your cells immediately after sowing; garden memories are often shorter than you think. - If you are using peat-based mixes, pre-moisten the soil in a bucket before filling your trays to ensure even hydration. - Bottom water your trays by placing them in a larger, solid tray and allowing the soil to absorb moisture from below to prevent washing out tiny seeds. - Monitor the temperature of your setup, as most vegetable seeds prefer a warm environment between 65°F and 75°F to germinate effectively. - Once seedlings reach about 3 inches tall, consider supplementing with a liquid organic fertilizer at half strength to support leaf development. ## Quick takeaway: Invest in specialized seed-starting mix and properly sized cells to provide the structural and nutritional foundation your seedlings need to thrive.
 Seed Starting & Saving
The Foundation of Growth: Choosing Your Seed-Starting Gear
3 min read 685 words
A guide to selecting the right cells, trays, and soil to ensure your seeds develop into healthy, robust garden transplants.
#seed starting#gardening tips#spring garden#seedlings#gardening for beginners