


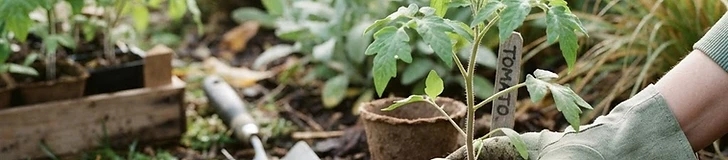
Watching your tiny green sprouts emerge under the warm glow of grow lights is one of the most rewarding parts of gardening. However, the transition from the stable, climate-controlled environment of your living room to the harsh reality of the outside world is a massive shift for a plant. If you move them too quickly, you risk stunting their growth, burning their leaves, or losing them entirely to transplant shock. Successful gardening requires mastering the gentle art of hardening off—a process of gradual acclimation that builds strength and resilience in your young garden starters.
Why Hardening Off Matters
Your indoor seedlings have lived a life of luxury. They have experienced constant temperatures, no wind, and filtered light. Outside, plants face direct, intense ultraviolet radiation, fluctuating temperatures between day and night, and physical stress from wind. When a tender seedling is plunged straight into these conditions, it can suffer from leaf scorch or physical collapse. Hardening off is essentially a weight-training program for your plants. It allows them to thicken their cell walls, develop a sturdier cuticle to retain moisture, and adjust their internal chemistry to handle the stresses of a natural environment.
The Seven-Day Acclimation Schedule
Plan for at least a week to ten days of gradual exposure. Start on a calm, overcast day, as clouds provide natural protection against the harsh midday sun. On day one, move your seedlings outside for just one hour of shade or partial sun, then bring them back inside immediately. Each day thereafter, increase their time outdoors by about one to two hours, slowly introducing them to more direct sunlight as the week progresses. By the time you reach day seven, your plants should be able to spend the full day and night outside, provided that the nightly temperatures are safe for that specific crop species.
Watching for Signs of Distress
As you begin this process, you are the plant's coach. Keep a close eye on their behavior. If you see leaves drooping significantly or turning pale, they are experiencing stress and need more shade or less time outside. If your plants are "leggy"—meaning they have long, thin stems—ensure they are getting proper light levels during their indoor phase. Remember that wind is also a factor; if you live in a particularly breezy area, avoid placing trays in high-wind zones during the first few days of hardening off, as the wind can dehydrate tender stems faster than they can replace lost water.
Preparing the Soil and Root Zones
Before you transplant, ensure your garden soil is prepped and ready. Avoid transplanting into cold, soggy soil, which can cause root rot. If you are planting in USDA zones 5 through 7, wait until the danger of frost has passed. Soil temperatures for warm-weather crops like tomatoes or peppers should ideally reach at least 60°F to 65°F. Gently loosen your garden soil to a depth of 6 to 10 inches and mix in organic compost. This creates a soft, aerated environment where the roots can easily stretch out after being cramped in a plastic cell or nursery pot.
The Day of the Big Move
Choose an afternoon for planting, preferably when the sun is beginning to dip. This gives your seedlings the cool evening and night to settle into their new homes without being immediately hit by the intense heat of the following morning. To transplant, invert the container carefully, holding the stem between your fingers to support the plant. Avoid pulling on the stem. If the roots are tightly wound or circling the bottom of the pot, gently tickle them to encourage them to grow outward. Dig a hole just deep enough to cover the root ball, water thoroughly with a gentle stream, and consider adding a small amount of liquid seaweed fertilizer to help reduce initial transplant shock.
Practical Tips
- Check the local frost date for your specific region before scheduling your hardening off process.
- Keep seedlings well-watered during the hardening off period, as they will dry out much faster outside than they do indoors.
- If a cold snap is forecasted, keep your plants indoors for a few extra days; do not rush to get them into the ground early.
- Use a cold frame or a temporary cloche if you need to protect young plants from unexpected spring breezes.
- Label your plants clearly; seedlings often look very similar until they start producing true leaves or flowers.
- Don't fertilize heavily right at transplanting; let the plant focus its energy on root establishment first.