


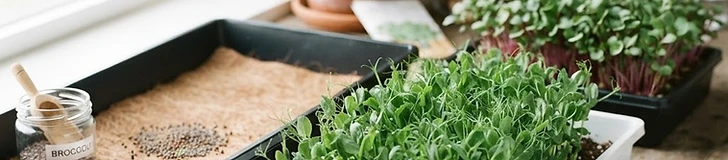
Growing microgreens at home is one of the most rewarding ways to garden regardless of your outdoor growing zone or available sunlight. Within just seven to fourteen days, you can harvest dense, nutrient-packed greens right from your kitchen counter. Success, however, relies on understanding the trifecta of microgreen production: the tray, the medium, and the seed.
Choosing the Right Trays
Many beginners make the mistake of using deep containers. Microgreens do not require significant root depth, as they are harvested before they develop a complex root system. The industry standard is the 10x20 inch tray, but for home gardeners, 10x10 or even smaller shallow containers are often more manageable. The most important feature is drainage. Your trays must have holes to allow excess water to escape, preventing the stagnant conditions that lead to damping-off disease. If you are using solid trays, you should use a double-tray method: one tray with drainage holes nested inside a solid tray to collect runoff.
Selecting the Best Growing Medium
The medium acts as a moisture reservoir and an anchor for delicate roots. For home gardeners, coconut coir is an excellent choice. It is lightweight, holds moisture exceptionally well, and is generally free of the soil-borne pathogens sometimes found in garden dirt. Peat-based seed starting mixes are also effective, though they can become overly acidic or compacted if not managed correctly. Some gardeners prefer to grow on hemp mats or wood fiber pads. These are clean, compostable, and simplify the cleaning process, though they offer less forgiveness than soil-based media if you forget to water for a day.
The Importance of Seed Quality
Not every seed is created equal. When shopping for microgreens, you must look for seeds labeled as untreated. Avoid seeds intended for traditional vegetable gardening that have been coated with fungicides. High-germination rates are critical because you are sowing seeds much more densely than you would in a backyard row. Dense sowing creates a canopy that prevents the soil from drying out and supports the stems, but it also creates a humid environment where mold thrives. Choosing high-quality, organic-grade seeds reduces the likelihood of encountering mold issues during the germination phase.
Optimizing Environmental Conditions
Once planted, most microgreens require a blackout period. By covering your seeds with an inverted tray or a piece of cardboard for the first two to four days, you mimic the natural depth of soil, which encourages the seeds to push roots downward before focusing on top growth. Keep the room temperature between 65°F and 75°F. Once the seeds have germinated and the stems reach about an inch, expose them to light. A standard LED shop light placed six inches above the trays is sufficient to prevent the greens from becoming leggy or stretching toward the nearest window.
Practical tips
- Always pre-moisten your medium before sowing to ensure consistent seed contact.
- Sow seeds evenly across the surface to avoid clumps that lead to localized rot.
- Use a spray bottle for the first few days to keep the surface damp without dislodging the seeds.
- Harvest using a clean pair of sharp scissors just above the soil line to ensure the cleanest possible greens.
- If you see white fuzz near the base of the stems, check if it is root hairs, which are natural, or mold, which has a distinct, unpleasant odor.
- Rotate your trays daily if they are near a window to ensure uniform growth.
Quick takeaway
Focus on using shallow, well-draining trays with high-quality, untreated seeds and a moisture-retaining medium like coconut coir for a consistent, reliable harvest.