
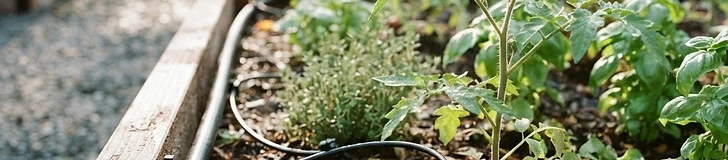
Consistently moist soil is the secret to high-yielding raised beds, especially during the sweltering heat of mid-summer. This guide helps you set up a gravity-fed or hose-attached drip system that delivers water directly to the root zone, keeping foliage dry and preventing common fungal issues.
Essential Supplies
To get started, you will need a basic starter kit, which includes a timer, a pressure regulator, and a distribution manifold. You should also have:
- 1/2-inch poly tubing (main line)
- 1/4-inch micro-tubing (emitters)
- Hole punch tool
- Goof plugs (for patching mistakes)
- Stakes to secure tubing
Designing Your Layout
Measure your bed length in feet to determine your main line needs. Run the 1/2-inch tubing along the inside perimeter of the raised bed. If your bed is wider than 3 feet, consider running a center line to ensure even coverage across the entire planting area. Use the hole punch to insert micro-tubing at 12-inch intervals near the base of individual plants.
Pro tip: Run your main irrigation line under the soil surface or cover it with a layer of mulch; this prevents UV degradation and keeps the plastic from becoming brittle in temperatures above 90°F.
Installing Emitters
For thirsty vegetables like Solanum lycopersicum (tomatoes), use 2-gallon-per-hour emitters. For greens and herbs, 1-gallon-per-hour emitters are usually sufficient. Attach the emitters to the ends of your micro-tubing and place them directly onto the soil surface. This precise delivery means you aren't wasting water on walkways or weeds.
System Maintenance
Once installed, flush the system by running it for two minutes before attaching the final end caps to clear out any plastic shavings or debris. In regions with freezing winters, like USDA zones 5 or 6, remember to disconnect your timer and drain the lines before the first hard frost to prevent the tubing from cracking.
With your system automated, your plants will receive a slow, steady drink that promotes deep root growth and healthier harvests throughout the season.