
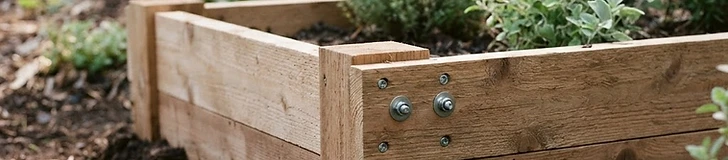
Building a custom raised bed allows you to bypass poor soil conditions and gain better control over your drainage and nutrient levels. By using naturally rot-resistant materials, you can create a sturdy frame that lasts for several seasons in any USDA hardiness zone.
Select Your Materials
Choose rot-resistant woods like cedar or redwood to ensure longevity without needing toxic chemical treatments. For a standard 4-foot by 8-foot bed, you will need:
- 3 boards of 2x10 cedar (cut to 8 feet long).
- 1 board of 4x4 cedar (for corner posts).
- 3-inch exterior-grade deck screws.
- A cordless drill and a level.
Assemble the Frame
Cut one of your 8-foot boards in half to create two 4-foot end pieces. Use the 4x4 lumber to cut four 10-inch corner posts. Align your boards against the corner posts, ensuring the frame is square. Secure each board using at least three screws per side to prevent bowing as you add heavy soil.
Tip: Pre-drill your pilot holes slightly smaller than the screw diameter to prevent the wood from splitting, especially when working near the ends of the boards.
Level and Prepare
Before filling, place your frame in a spot that receives at least 6–8 hours of sunlight daily. Use a spirit level on the top edges of the boards, excavating small amounts of soil beneath the frame until it sits perfectly flat. A level bed prevents water from pooling in one corner and ensures even moisture distribution during high summer heat.
Secure and Fill
Once leveled, line the bottom with heavy-duty hardware cloth if you live in an area with persistent gophers or moles. Fill the bed with a blend of 60% topsoil, 30% high-quality compost, and 10% vermiculite to create an ideal growing medium for your vegetables. Avoid using heavy garden soil straight from the ground, as it compacts easily in raised beds.
With your frame securely in place, you are ready to begin planting your favorite seasonal crops for a bountiful harvest.