

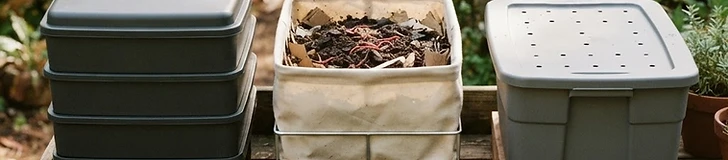
Choosing the right housing for your red wigglers (Eisenia fetida) is the first step to successful vermicomposting. Whether you have a small apartment or a large backyard, the right bin makes managing kitchen scraps at temperatures between 55°F and 77°F much easier.
Stacked Tray Systems Stacked trays are the most popular choice for beginners. These bins consist of multiple vertical layers. As worms finish eating the food in the bottom tray, they migrate upward through mesh openings to fresh layers. This design makes harvesting castings effortless, as you simply lift off the bottom tray once it is full of finished compost. They are compact, making them ideal for garages or pantries in any USDA zone.
Flow-Through Bins Flow-through bins are built vertically with an open bottom, allowing worms to move naturally from top to bottom. You add fresh bedding and scraps to the top, and finished vermicompost is harvested from the bottom grate. These systems are highly efficient for larger families because they hold a larger volume of material. Gravity does the work for you, keeping the bedding aerated and preventing compaction.
Tip: Always keep your worm bin in a shaded area away from direct sunlight; extreme heat above 85°F can be fatal to your worm colony.
DIY Storage Tubs DIY plastic bins are the most budget-friendly entry point. You can create a functional home using two opaque storage totes. Drill 1/8-inch holes near the top rim for ventilation and a few in the bottom for drainage. By nesting one inside the other, the top bin holds the worms while the bottom catches liquid leachate. This is a great weekend project, provided you use opaque plastic to keep the interior dark and mimic the worm’s natural subterranean environment.
Factors for Success 1. Capacity: Match bin size to your daily kitchen scrap output.
- Drainage: Excess liquid must escape to prevent odors and anaerobic conditions.
- Accessibility: Ensure your chosen spot allows for easy turning of materials or harvesting of castings. Regardless of the design you choose, consistency with moisture and carbon-rich bedding will keep your worm colony thriving and producing rich fertilizer for your garden beds year-round.