
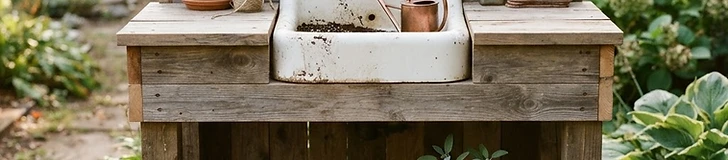
Turning an old kitchen or bathroom sink into a potting bench creates a dedicated, easy-to-clean station that saves your back during transplanting season. This project combines salvaged materials with durable lumber to create a centerpiece for your garden shed or patio.
Gather Your Supplies
To start your bench construction, you will need basic framing lumber, like pressure-treated 2x4s for the base and exterior-grade plywood for the surface. Ensure your sink is intact, specifically with a functioning drain hole. You will need:
- One vintage sink (cast iron or stainless)
- Six to eight 8-foot 2x4 boards
- 3-inch exterior deck screws
- A drill and a circular saw
- A measuring tape and level
Building the Frame
Start by measuring your sink's width and length, then build a rectangular frame using your lumber supports that provides a 1-inch overlap on all sides. Build the legs to a comfortable height, usually 36 to 40 inches, so you are not hunched over while repotting your tomatoes or peppers. Ensure the frame is level; a wobbly bench makes potting delicate seedlings frustrating. Cross-brace the legs near the bottom to keep the structure rigid.
Installing the Sink
Trace the outline of your sink onto the plywood surface, then carefully cut the hole slightly smaller than the basin so the sink rim rests on top. Drop the sink into place and secure it using silicone caulk for a waterproof seal.
Pro tip: Run a hose to the drain or place a 5-gallon bucket beneath the sink basin to capture soil runoff, preventing debris from clogging your garden pathways.
Customizing Your Station
Maximize your work efficiency by adding hooks on the side for your hand trowels and pruners. You can also attach a piece of pegboard to the back of the bench for vertical tool storage. If you garden in colder regions, like USDA zones 5 or 6, keep this bench under a covered area to protect the wood from the freezing temperatures that can cause warping or cracking during the winter months.
Final Touches
Finish your wood with a high-quality outdoor sealant or exterior paint to protect it from moisture and UV damage. Proper maintenance ensures your workstation remains a staple of your garden for years to come. Once sealed, you have a professional-grade setup perfect for starting seeds or prepping containers for your summer blooms.
Happy building and enjoy your new organized gardening workspace.